About Me

My photo
My favorite memories have all centered around friends and family enjoying a meal together! It might have been a special holiday or a celebration, or it might have been dinner with friends at a great restaurant. I hope you will enjoy some of my favorite recipes and take time to fellowship with those seated at your table. You might make a memory to last forever!

Tuesday, May 1, 2012

Bananas, Bananas, Bananas

What do you do with lots and lots of bananas?  I bought a 3 pound bag of ripe bananas at the grocery store a couple of days ago for $1.47!  I thought, wow, what a great bargain!  The only thing about over-ripe bananas is...I don't like to eat them with black spots on them!  So, that means I need to get busy using them before they go to the compost pile!  We have been drinking a lot of smoothies lately and bananas are one of my favorite fruits to use!  It is super easy to freeze bananas...I'll share more on smoothies later! 

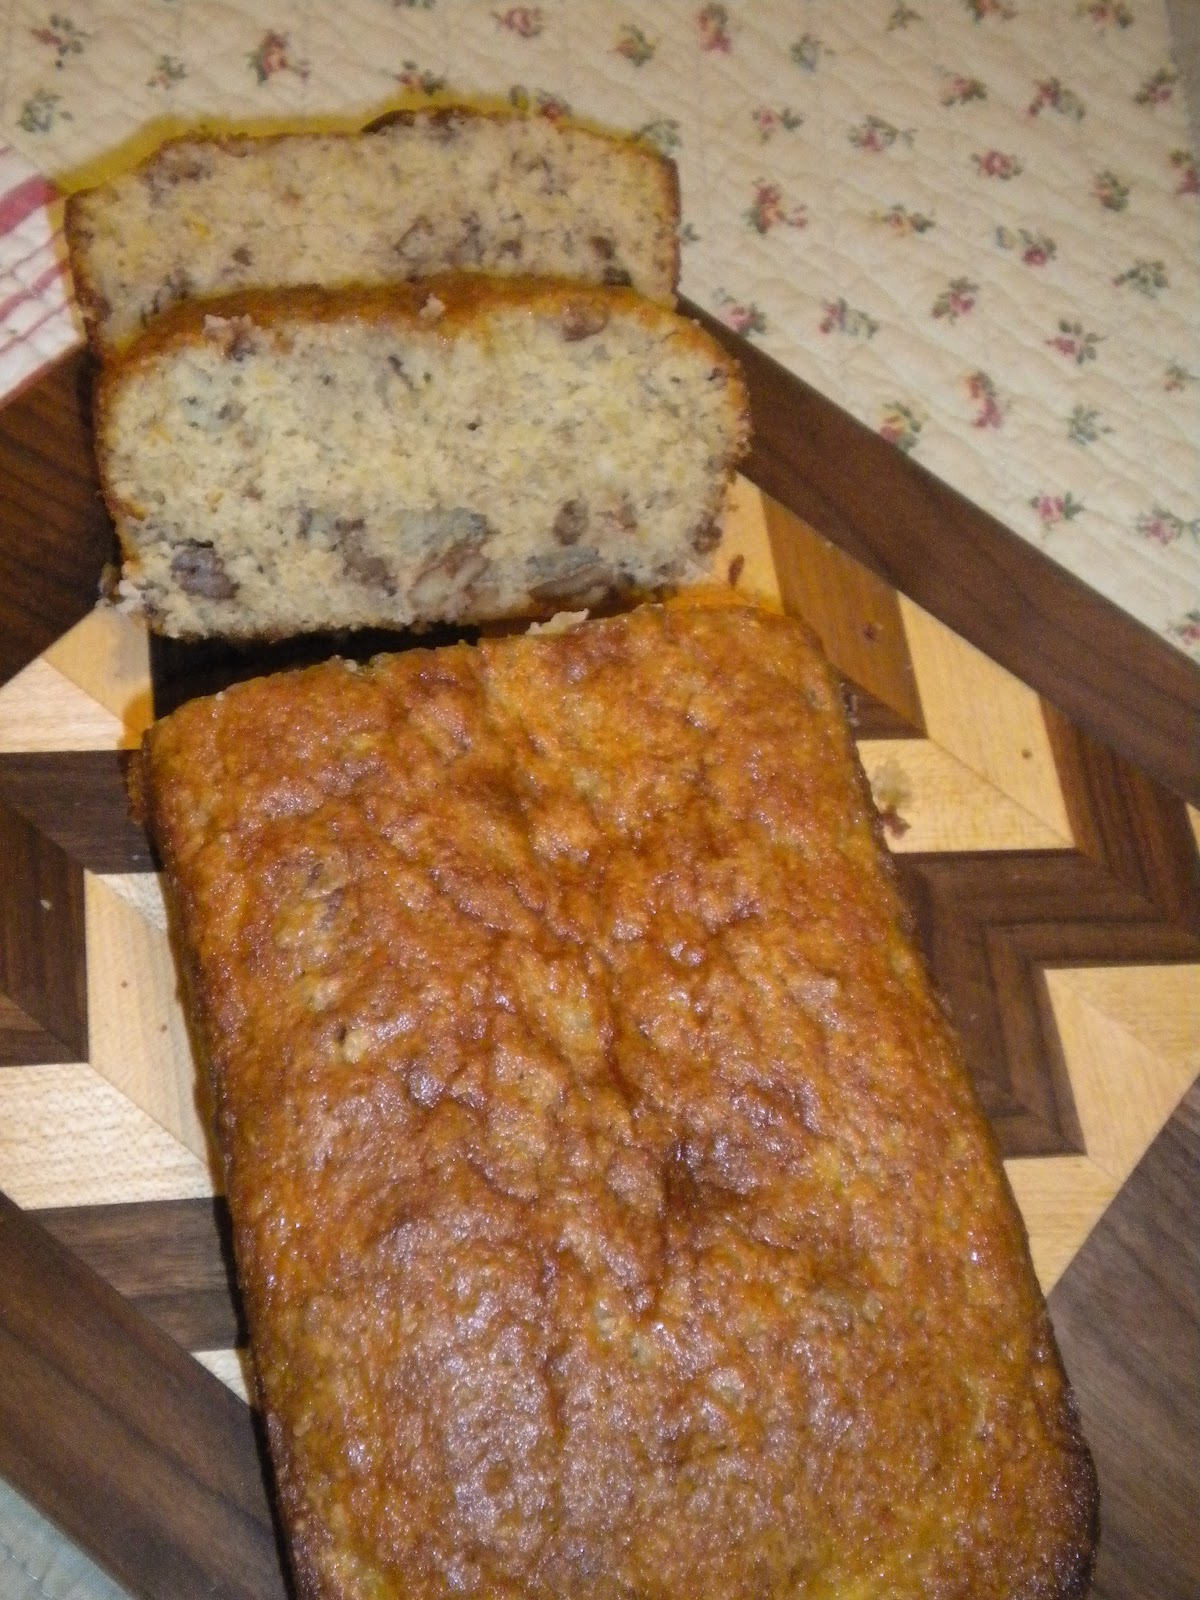
Now, let's get busy using some of these ripe bananas!  Everybody has their favorite Banana Bread recipe...either handed down from Grandma or your own personal creation!  Some people like chocolate chips, peanut butter, cream cheese or other interesting additions!  My favorite Banana Bread recipe is one that I have been making for years and I'm not sure where I found it, so I have no one to give the credit to!  I guess I'll claim it!  The interesting ingredient used in my recipe is a yellow cake mix!  It is not as dense as some recipes, but it is so rich, buttery and moist!  It can be served as a cake with a broiled topping or caramel frosting, but I like it warm, out of the oven with a glass of milk!  I usually bake it in a tube pan, but tonight I used two loaf pans...so I can share one with a friend!  I hope you will enjoy this recipe as much as I do!

Banana Bread

1 stick butter, melted
1/2 c. oil
1/2 c. sugar
3 eggs
3 bananas, mashed
1 box yellow cake mix
1 c. chopped nuts (optional)
Crushed graham cracker crumbs

Preheat oven to 350 degrees.

Mix melted butter, oil sugar and eggs together.  Add remaining ingredients and mix well.  Pour into greased pan(s), floured with crushed graham cracker crumbs.  Bake at 350 degrees for appx. 1 hour.


Thursday, April 19, 2012

Make Ahead Dessert

Do you ever have left-over brownies?  I didn't think so!  Well, my family is strange and I ended up with a full pan of brownies sitting on my counter.  Of course, I could have finished them off...but, I thought better and quickly put them a ziplock bag and threw them in the freezer!  Temptation averted...until I decided to make a dessert for my school friends and remembered the frozen brownies!  Trifle recipes seem to be making a comeback from the 70's and many of them start with brownies.  So, there you go...dessert will be served on Friday!  Great way to end the week!

A Trifle can be made with so many different choices for your base ingredient...cake pieces, day old brownies, broken cookies!  You can drizzle syrup, liqueor, or fruit puree over the base and then start layering your other ingredients...pudding, fresh fruit, whipped topping, chopped nuts, chopped candy bars, coconut...the list is endless!  This dessert is best served in a trifle bowl or a large glass bowl, so you can see the different layers!  Trifles are also fun to layer in individual servings...I like to use a Mason Jar!  A jar with a lid makes a trifle a convenient dessert to take to the beach or on a picnic! For "just a bite" of dessert, use any small glass jar that you have.  A shot glass works great, but I happened to have a couple of baby food jars in my cabinet!  Stores like Pier 1 actually sell cute little single serving glass dishes!  Have fun and try different flavors!

Brownie Trifle

Brownies (your favorite recipe or a box mix)
Caramel/Butterscotch Ice Cream Topping
2 boxes Chocolate Pudding (mixed according to directions)
Heath Bits of Brickle
Whipped Topping (appx. 2 small containers)

Start layering with 1/2 of brownies, drizzle with syrup, carefully spread 1/2 of pudding over syrup, sprinkle Heath brickles next and top with 1/2 of whipped topping.   Repeat layers, ending with whipped topping.  You can top with syrup or a sprinkle of brickle!


Wednesday, April 18, 2012

What's For Dinner?

What's for dinner is always the question after work!  There are always a few staples that I have on hand...ground meat, taco seasoning and cheese!  There are so many things to make with those ingredients...and who doesn't love tacos?!  I recently read a recipe that used a pizza crust to make something called "Trash Pizza"...which means you use any left over ingredients that you might have to make a pizza!  But, it is not an ordinary pizza...it is a pizza roll!  Fun and something different!  So, I thought, why not make a Taco Pizza Roll!  I have all the ingredients and it doesn't seem too hard!  The hardest thing for me is rolling out the crust...I'm not a pizza maker!  The fun thing about a "Trash Pizza Roll" is that you can use any meat, any sauce and any cheese you like!  I hope you will give this recipe a try, but also change it up a bit and have fun!

Trash Pizza Roll

Pizza Crust (I used a package mix, but the refrigerated roll is great!)
Ground meat seasoned with Taco Seasoning
8 oz. cream cheese, softened
1/2 to 1 cup sour cream
Taco Sauce
Shredded Cheese (Monterey Jack or Cheddar)
Sauteed onions (optional)
Jalapeno Peppers (optional)
Salsa (optional)

Preheat oven to 400 degrees. Brown meat and season with taco seasoning. Combine cream cheese and sour cream; mix until smooth.  Add taco sauce to taste. Roll pizza crust into a rectangle on greased, wax paper. Spread cream cheese mixture on crust; top with seasoned meat. Add onions and peppers, if desired. Top all with shredded cheese; the amount is to your liking!

Start with long side of dough and begin to roll, jelly roll fashion, guiding with waxed paper.  Continue to roll, very gently. Carefully transfer pizza roll to a greased pan, using the waxed paper to aid in moving it; placing it seam side down.  Bake in 400 degree oven for 20 to 25 minutes.  Allow to cool slightly before serving.  Serve with sour cream and salsa, if desired.

(This recipe was created by me, to please my family's taste!  Feel free to adjust any, or all, of the ingredients to please you and your family.)


Monday, April 2, 2012

Happy Spring!

Wow, it has been a long time since I have posted anything on my blog! I could tell you that I was too busy, too tired, on vacation or spending too much time on Pinterest! Yep, the last one would be true! I really like reading other peoples recipes and ideas, but I am ready to get back in the groove and share some of my favorites with you! Spring is here, or depending on where you live, summer is here! I look forward to sharing some of my springtime recipes with you!

I will also be throwing in some ideas for healthy alternatives for those of us that have tummy issues! Digestive problems are very common in our society, and I have enjoyed reading and learning about more foods that will help with these tummy issues!

Cheesy Ckicken Doritos Casserole

Isn't it great to be prepared for dinner a day or more ahead of time!  I love being at work and think "what's for dinner?"....and then remember that I planned and prepared earlier in the week!  Sometimes the meal can be complete or at least have cooked the majority the day before!  This recipe is so easy and quick to put together...especially if you already have the chicken cooked!  This is a dish that is sure to please everyone...who doesn't like cheese and Doritos!

Cheesy Chicken Doritos Casserole

1 bag of Nacho Cheese Doritos
3 cups cooked chicken, chopped
8 oz sour cream
1 can cream of mushroom soup
1 can cream of chicken soup
1 can Rotel Tomatoes
2 cups Cheddar or Monterey Jack cheese
Garlic Powder, Salt and Pepper to taste
Green Onions or sweet onion, chopped
     (optional)


Preheat oven to 350 degrees.

Lightly spray a 9x13 pan with cooking spray. Crush the entire bag of Doritos and cover the bottom of the dish;  saving some for top of casserole.   Reserve one cup of cheese; mix together remaining ingredients in a large bowl.  Pour chicken mixture over the Doritos.   Bake for 30 minutes or until bubbly. Top casserole with the remaining cheese and Doritos and bake 5 additional minutes or until melted.

Any kind of cheese works well...of course I used more than the recipe calls for!
Use a rotisserie chicken for quick preparation.  I actually cooked my chicken the day before and chopped it before mixing.


Tuesday, January 24, 2012

Lemon Drop Cookies

A friend of mine gave me the idea of this delicious, tart lemon cookie!  It's a little crunchy, a little like candy, and a whole lot tart; a true lemon lover's treat!  It is so easy to make...give it a try!

Lemon Drop Cookies

1 package sugar cookie mix
1 small bag of Lemon Drop candy

Preheat oven to 350 degrees.
Prepare sugar cookie mix as directed on bag...for drop cookies.
Using a mallet, crush lemon drops into tiny pieces.
Mix well into cookie dough.
Place 1 tablespoon cookie dough 2 inches apart on cookie sheet.
Bake for 10 minutes.  Cool completely before moving to cooling rack.


Easy Lemon Pound Cake

I had the privilege of making my best friend's birthday cake this evening!  I ask her what "flavor" she wanted, but, of course I knew what it was...Lemon!  It is so awesome to have a friend that you know so much about!  One of the reasons I know so many things about my friend is...we have so much in common!  Well, food, that is! (Her movies are way to scary for me!)  We like the same fast food, the same adult beverages, the same restaurants, etc.!  The list goes on and on!  So, of course, with my love for lemon...I knew exactly what "flavor" to make!  I love making everything from scratch, but sometimes there isn't enough time in the day!  That's when a cake mix comes in real handy!  Of course, it need not fly alone...there are so many ways to dress it up!  So, always keep one or two boxes of cake mix in your pantry...and you will be prepared to make a yummy cake on a moments notice!  This Lemon Pound Cake is so moist; it is delicious served just as it is...warm from the oven or with a lemon glaze drizzled over top! (This happens to be my Dad's favorite cake!)  But, for my friend, I thought it needed a creamy, lemony frosting!  Enjoy!!

Easy Lemon Pound Cake

1 Lemon Cake Mix
1 (3.4 oz) pkg instant lemon pudding and pie filling
4 large eggs
1 cup water (or milk or buttermilk)
1/3 cup vegetable oil

Preheat oven to 350°F. Grease and flour 10-inch tube pan.

Combine cake mix, pudding mix, eggs, water and oil in large bowl. Beat at medium speed with electric mixer for 2 minutes. Pour into pan.

Bake at 350°F for 50 to 60 minutes or until toothpick inserted in center comes out clean. Cool in pan 25 minutes. Invert onto heat resistant serving plate. Cool completely.

Glaze: Combine 2 cups powdered sugar and enough lemon juice to make it a drizzling consistency. Drizzle over cooled cake.


Easy Lemon Icing:  Combine 1 tub of lemon frosting with 1 8 oz. cream cheese (softened).  Beat cream cheese until light and fluffy; add lemon frosting and blend until well combined.